

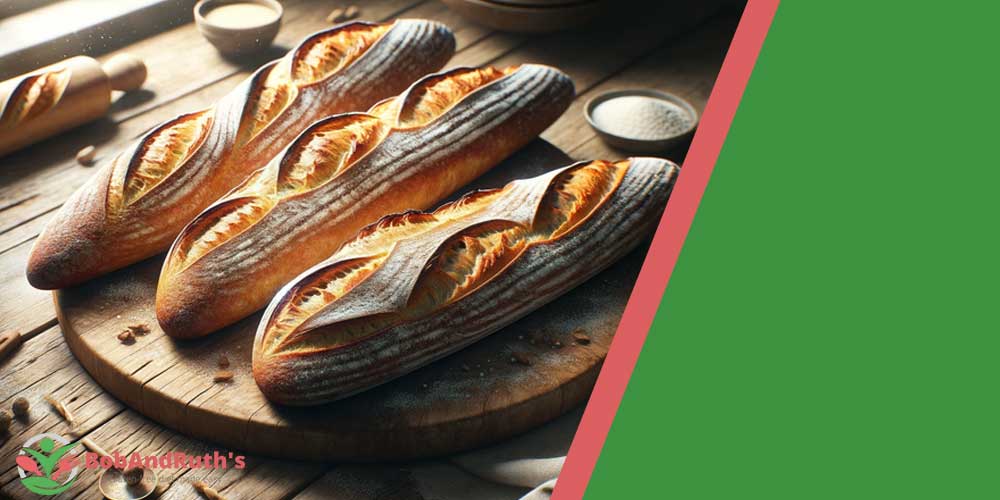
Discover the secrets to baking the perfect gluten-free baguettes with our comprehensive guide.
Our meticulously crafted recipe not only rivals traditional French bread in taste and texture but also offers a healthy alternative for those with gluten sensitivities.
Now bake with our expert tips and tricks, and get ready to enjoy freshly baked bread right from your kitchen.
Selecting the Right Gluten-Free Flours
Creating delightful gluten-free baguette starts with choosing the ideal gluten-free flour.
This choice is pivotal in mimicking the texture and flavor of traditional French bread while ensuring the recipe is safe for those with gluten sensitivities or celiac disease.
Our chosen gluten-free bread flour blend comprises rice flour, tapioca flour, and potato starch, each playing a unique role in the bread’s structure and taste.
Rice Flour
Rice flour acts as the backbone of our gluten-free flour blend. It’s a versatile flour that brings a neutral flavor, making it an excellent base for our baguettes.
It provides the necessary bulk and structure to the dough, ensuring the bread has a satisfying chewiness akin to real bread made with traditional wheat flour.
Tapioca Flour
Tapioca flour, derived from the cassava root, introduces a light, airy texture to our baguettes.
It’s the secret ingredient for achieving a tender crumb and a crust that’s crispy yet not too hard.
Tapioca flour’s binding properties also contribute to the elasticity of the dough, a crucial aspect missing in gluten-free baking.
This flour ensures our baguettes don’t crumble and maintain a pleasant, cohesive texture.
Potato Starch
Potato starch is included in our blend for its exceptional moisture-retention capabilities.
It helps keep the inside of our baguettes soft and moist, preventing the dry, crumbly texture often found in gluten-free baked goods.
Unlike potato flour, potato starch is flavorless and doesn’t weigh down the bread, ensuring our baguettes have a light, airy feel.
Making the Perfect Baguette Blend
The secret to our successful gluten-free baguettes lies in the precise ratio of these flours.
Combining 2 cups of rice flour, 1.5 cups of tapioca flour, and 1 cup of potato starch offers a balanced mix that closely mimics the properties of gluten found in traditional bread flour.
This blend ensures our baguettes are soft and tender on the inside with a golden, crispy crust on the outside.
In addition to these flours, we add xanthan gum to our blend. Xanthan gum acts as a stabilizer and thickener, replacing the binding qualities of gluten.
Just a teaspoon of xanthan gum makes our dough elastic and stretchy, vital for forming the characteristic shape of a baguette without falling apart.
Key Ingredients for Authentic Taste
- Xanthan Gum: A teaspoon of xanthan gum is essential. It replaces gluten’s elasticity, crucial for a chewy texture.
- Instant Yeast: Use 2 teaspoons to help your dough rise and achieve that characteristic baguette texture.
- Cider Vinegar: A tablespoon of cider vinegar enhances the dough’s texture and mimics the tangy flavor of traditional baguettes.
- Warm Water: Essential for activating the yeast, ensuring your baguettes rise perfectly.
- Egg Whites: Whisked egg whites (from 2 eggs) improve the dough’s structure and contribute to a crispy crust.
The Perfect Environment for Gluten-Free Dough
Creating the perfect environment for gluten-free dough is crucial for achieving the best texture and rise in your gluten-free baguettes.
Unlike traditional bread dough, gluten-free dough requires specific conditions to thrive, mainly due to the absence of gluten which affects the dough’s elasticity and ability to rise.
Here, we’ll guide you through setting up the ideal environment for your gluten-free bread recipes to flourish.
Warmth is Key
For gluten-free dough, particularly when making gluten-free French baguettes or bread, warmth is essential.
The ideal temperature for proofing gluten-free dough is between 75°F and 85°F (24°C to 29°C).
This warmth activates the yeast, a critical ingredient in our recipe, helping the dough to rise and develop flavor.
If your kitchen is cooler, you can create a warm environment by placing the dough in an oven with only the light turned on, or by setting it near a warm but not hot appliance.
Moisture Matters
Gluten-free doughs, including those for gluten-free baguette and gluten-free French baguette, tend to be stickier and wetter than their gluten-containing counterparts.
This extra moisture helps to replace the elasticity normally provided by gluten.
To maintain this moisture during the rising process, cover the dough with oiled plastic wrap.
The oil prevents the dough from sticking to the wrap, while the plastic keeps moisture in, preventing the dough from drying out.
Rise Time
Patience is vital when working with gluten-free bread dough.
Gluten-free bread recipes, including those for baguettes, often require longer rise times than traditional bread recipes.
Allow your dough to rise in a warm, moist environment until it has nearly doubled in size.
This may take anywhere from 30 minutes to an hour or more, depending on the specific recipe and environmental conditions.
Avoiding Drafts
Keep your rising dough away from drafts, as sudden temperature changes can hinder yeast activity and affect the rise of your gluten-free bread.
A stable temperature ensures consistent rising and helps develop the structure and texture of your baguettes.
When crafting gluten-free baguettes, using the right blend of gluten-free flours—like rice flour, tapioca flour, and potato starch—is just the beginning.
The magic happens when these ingredients are brought together in the perfect environment, allowing the dough to rise and transform into freshly baked bread with a tender crumb and golden brown crust. Remember, achieving the perfect bake is not just about the ingredients;
it’s also about creating the optimal conditions for your gluten-free french bread to develop its characteristic baguette texture and delicious taste.
Making Your Baguette: Step-by-Step
- Mix Dry Ingredients: Combine the flour blend with 2 teaspoons of instant yeast, 1 teaspoon of xanthan gum, and a pinch of salt.
- Hydrate: Gradually add 1.5 cups of warm water and 2 tablespoons of olive oil while mixing.
- Knead: Use a stand mixer with a dough hook to knead the dough until smooth. Gluten-free dough will be stickier than traditional dough.
- Shape: Transfer the dough to a floured surface. Divide and shape into slender loaves.
- Proof: Let the loaves rise in a warm, draft-free area until they’ve nearly doubled in size.
- Bake: Score the loaves with a sharp knife, then bake in a preheated oven at 425°F (220°C) until golden brown.
Tips for the Perfect Crust and Crumb
- Moisture is Key: Mist the oven with water before baking to create a crisp crust.
- Scoring: Deep, angled cuts will help the baguettes expand properly.
- Cooling: Let the baguettes cool completely on a wire rack to prevent the crust from becoming soggy.
Equipment Needed in Baking Gluten-Free Baguettes
- Baguette Pan: A perforated baguette pan helps heat distribute evenly, crisping the crust.
- Mixing Bowls: Opt for glass or metal; their smooth surfaces help with sticky gluten-free dough.
- Dough Scraper: A flexible dough scraper is invaluable for handling and shaping wet dough.
Serving and Storage
Enjoy your gluten-free baguettes fresh out of the oven or as a base for delicious garlic bread.
Store leftover baguettes in an airtight container to maintain freshness.
For longer storage, slice and freeze, then reheat in the oven for a like-fresh taste and texture.
Conclusion
With the right ingredients, techniques, and equipment, baking gluten-free baguettes at home is not only possible but also incredibly rewarding.
Whether you’re craving a crunchy sandwich base or a side for your favorite soup, these baguettes will not disappoint.
Enjoy the simple pleasure of baking and the joy of sharing gluten-free French bread that everyone can savor.

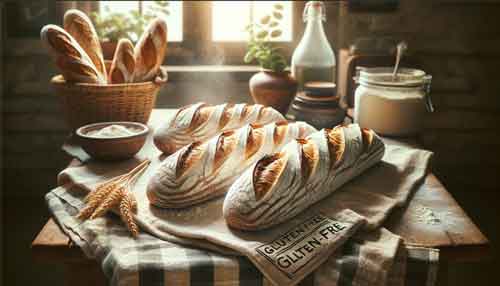
Gluten-Free Baguette Recipe
Enjoy the taste of freshly baked bread with our easy gluten-free baguette recipe. Perfect for sandwiches or as a side, this bread is crispy on the outside and soft on the inside. It's a delicious option for anyone avoiding gluten.
Course Side DishCuisine FrenchKeyword gluten free
Prep Time 20 minutes Cook Time 35 minutes Total Time 55 minutes
Servings 2 Baguettes
Calories 250kcal
Ingredients
- 2 cups rice flour
- 1.5 cups tapioca flour
- 1 cup potato starch
- 2 teaspoons instant yeast
- 1 teaspoon xanthan gum
- 1 tablespoon cider vinegar
- 1.5 cups warm water
- 2 tablespoons olive oil
- 2 egg whites, lightly beaten
- 1 teaspoon salt
Instructions
- Mix Dry Ingredients: In a large bowl, combine the rice flour, tapiaca flour, potato starch, instant yeast, xanthan gum, and salt.
- Add Wet Ingredients: Gradually add the warm water, olive oil, cider vinegar, and beaten egg whites to the dry ingredients. Stir until well combined.
- Knead the Dough: Use a stand mixer with a dough hook attachment or knead by hand until the baguette dough is smooth.
- Shape the Baguettes: Divide the dough in half. On a floured surface, roll each half into a baguette shape. Place on a baguette tray or a baking sheet lined with parchment paper.
- Let it Rise: Cover the shaped dough with oiled plastic wrap. Let it rise in a warm, draft-free place for about 30 minutes, or until nearly doubled in size.
- Preheat Oven: While the dough is rising, preheat your oven to 425°F (220°C).
- Bake: Remove the plastic wrap. Make several diagonal slashes on the top of each baguette with a sharp knife. Bake for 35 minutes, or until the crust is golden brown.
- Cool: Allow the baguettes baking bread to cool on a wire rack before slicing and serving.
Notes
- For the best rise, ensure your water is warm but not too hot, as extreme temperatures can kill the yeast.
- If the dough is too sticky to shape, wet your hands with water or oil to prevent sticking.
- For a crunchier crust, spray the oven with water before baking or place a pan of water on the bottom rack.